Android, Web design, Software design and other Tech things

Showing posts with label android Tricks. Show all posts

Friday, September 24, 2021

WhatsApp multi-device beta Version

WhatsApp multi-device beta Version.

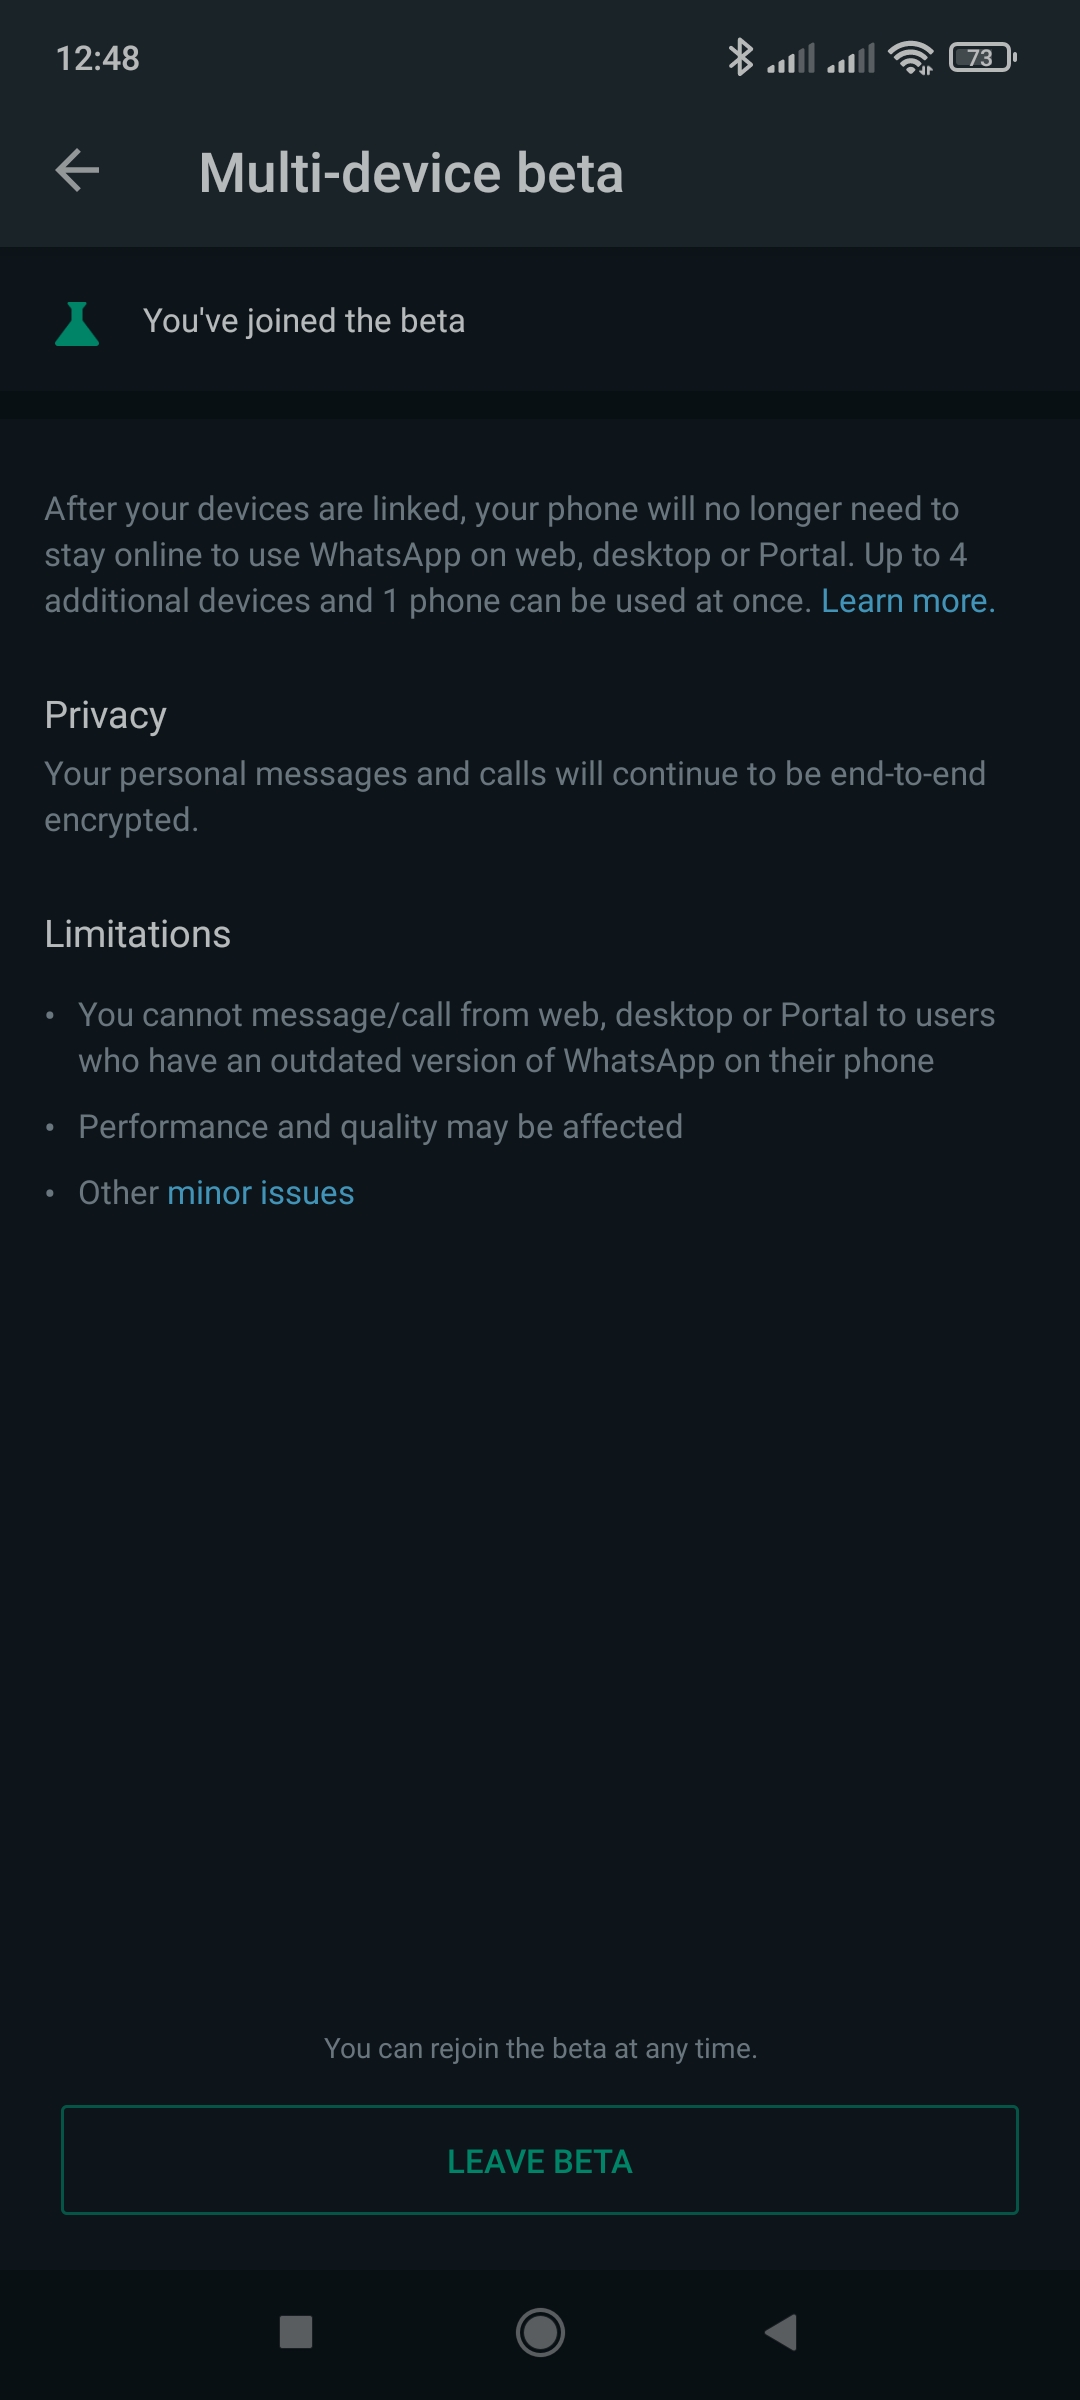
        WhatsApp has released a multi-device beta version last week. in this beta, The multi-device beta program gives you early access to WhatsApp's new version for Web, Portal, and Desktop. With this feature, you can use WhatsApp without keeping your phone connected. WhatsApp on up to 4 devices at the same time.  

You can also use WhatsApp on up to four devices at one time, though you must register and link new devices to your phone. If you don’t use your phone for over 14 days, your linked devices will become disconnected.

The multi-device beta is available to the beta users of the WhatsApp and WhatsApp Business app. These users can use the latest version of the app on their Android or iPhone.


Unsupported features

These features aren't currently supported in this version of multi-device beta:

  • Viewing live location on companion devices.
  • Pinning chats on WhatsApp Web or Desktop.
  • Joining, viewing, and resetting group invites from WhatsApp Web and Desktop. You’ll need to use your phone instead.
  • Messaging or calling someone who is using a very old version of WhatsApp on their phone won't work from your linked device.
  • Calling from Portal or WhatsApp Desktop to linked devices that aren’t enrolled in the multi-device beta.
  • Other WhatsApp accounts on your Portal won't work unless those accounts have joined the multi-device beta.
  • WhatsApp Business users can’t edit their business name or labels from WhatsApp Web or Desktop.

 how we enable this beta version?

first, go to the menu. then go to Linked Devices, then you can see the button to enable the WhatsApp beta version. any time you can leave the beta version.


For more details Click Here


so today is the end of the article. Don't forget to like, comment and share...


Share:

Saturday, October 12, 2019

Connect Emulator or Mobile phone in Android Studio

As we all know we have to use a android or ios simulator to run android applications. Android simulator is a virtual device that we can create. As the example we can create a virtual Nexus-5 device to execute the built app.


These are the steps of creating Virtual device

Steps :

1) Open the Android Studio

2) Go to Tools -> AVD Manager


3) In this window we can see that existing Virtual devices.

4) Click Create Virtual Device 

5) Select the category you want to execute the app ( Phone is recommended )


6) Select Any device that you like and click next.

7) If there is any recommendation you have, download and install the requirements.


8) Then Select any Operating System and download that API.

9) click finish.

Yeah!! Now you are done with creating virtual device.
Now run the app via created device. This process takes some time to start android operating system and install the relevant app.

So we have a another method!!!

Using our mobile phone we can run our apps very fast. Only thing is need to connect our phone to compeer and give access to the mobile phone.

Steps :

1) In your mobile phone go to settings -> Developer Options.

2) Turn on the USB debugging.

3) Now provide the access 

4) Now android studio or any other platform will automatically recognized it as a executable media.


5) Then run the app.

See!! That is very efficient method.

Thank you.

For the further information about installing Android studio follow this blog.
Link : https://worldisandroid.blogspot.com/
Share:

Friday, December 18, 2015

Increase Internal Memory of Your Android Phone

Increase Internal Memory of Your Android Phone 


You know that the most important part of an Android phone is the internal memory. Because it installs every app. This internal memory is not a big problem for those who have a high-end phone with a lot of good money because their internal memory is like 8Gb, 16GB, 32GB but most of the low-end phones use it so this internal memory is very deep 1GB, 2GB, 4GB is like this, so we have less space for apps with knee-jerk music films. Finally, when we go to install apps, we say there is not enough memory. So let me tell you about a way to increase it. But for this, you need to have your phone rooted. Go here to see how to root.

There are two ways to increase internal memory.

1st method

By Partitioning a Memory Card (Partition Memory Card):
What we are actually doing is allocating some space from our memory card. Together we need a partition software and an app called Link2SD. With this app, we can install as many apps as we like.


1. First you need to download a Partition Wizard Manager. Download the one you like.
  1. mini Partition Wizard Manager Free
  2. EASEUS Partition Master 9.1.0 Home Edition

2. Connect your memory card to the computer with a card reader

3. Make a backup of the data on your SD card.

4. Now install the downloaded tool and open the memory card

5. Now right-click where your memory card is displayed and give the option "delete".


6. Right-click again and give the 'Create New' option. Creating a partition with "FAT32" is the only way to know the data like your song films.


7. Then do one "Create as Primary".


8. Then go to the previous one and give the desired memory to your phone memory as ext2 / ext3 / ext4 as one of these. Give ext2 to anybody because most phones support this.

9. Give it a “Create as the primary” (both the partitions we created must be primary or this will not work).


10. Now work or then give you're "apply" and then work right now 2 partitions have been created. Remember, you are now shown only the partition that was previously made of "FAT32".


Right now the first way is over

2nd method
In this case, you need to have ClockwordMod installed on your phone or you can not do this without your phone. If you have CWM, you can choose the one you like and work with it. I do not know the name of this. I do not know what to do with it. I do not know what to do with it.

You really need to have a custom ROM installed on your phone for this. I suggest you use the first method.

Let's see how to use Link2SD

1. You have now partitioned the memory card, then download this app now
 Link2SD (You also need to have your phone rooted for this)

2. Now insert the memory card into the phone and open the app

3. Then the box will ask you what is the format of your second partition and give it the ext2 / ext3 / ext4 you gave earlier. If you gave ext2, select one.


Then it says Mount Script Created and then reboot your phone. Then open the app again and if no message comes then it will work. Then you can click on the apps that you have on your phone and tick the ones at the bottom of the menu (app, Dalvik-cache, and library files). You can not put a tik together. You have to pay for that app together.

4. Then type "create a link".

5. Now look at the Storage Info and then you can see your storage info. Send it to your previous memory and the new one.

6 . Okay now you know as much as you can about the newly created part of the app.


So today is the end of the article. Don't forget to like, comment and share...

Share:

Wednesday, December 16, 2015

How to root my android phone


One of the questions most people who buy a new Android phone ask is "Should I root the phone or not".

Most Android phones have basic settings that the user can use with some restrictions. That means we can't do a lot of things related to the system. Rooting will cause you to lose all of these boundaries. That means we can add a lot of new work to our Android system.

Is it dangerous to root the phone?

I was too scared to root at first. But somehow finally rooted. Many people are afraid that their phones will be broken. But it is much less likely to break during rooting

Why root the phone?

Simply put, you can take full control of the phone. (I wanted to put Sinhala. I want to increase my memory.)

Advantages of rooting

1. Rooting removes the limitations of using an Android OS.

2. You can install unofficial Android versions (custom ROM). Some phones do not receive official updates on the latest versions of Android. You can then install a new version using a custom ROM. The phone must be rooted for this.

3. Some phones need to be rooted to take screenshots.

4. Ability to use Sinhala language. (For me, this is the biggest advantage).

5. Apps are installed on the phone's internal memory. You can install these apps on the SD card by rooting. (For me, this is the second biggest advantage).

6. The processor can be over-locked / under-locked.

 7. In addition, there are many other benefits. 

Disadvantages

1. Rooting some phones will not be able to make an official update.

2. Rooting can slow down the phone.

3. If rooting is not done properly, the phone may be Unusual things can happen.


Finally, I have to say. Rooting will void the warranty of the phone, and if you are new to Android, this is a bit risky. Therefore, rooting should be done very carefully. There are different ways to root each phone. And you can unroot it if you like.

Okay now let's see how to do it
  1. Go Here here and get that APP.
  2.  Install the app.
  3.  Then in the menu that appears, give the root.

Give install superSU first and then Gandalf.

All right, now reboot your phone. Then see if there is a superSU in your apps that is rooted.


So today is the end of the article. Don't forget to like, comment and share...


Share:
Always be courteous to contact us If you want any help.